
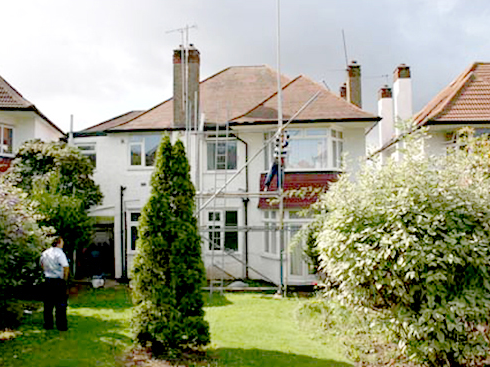
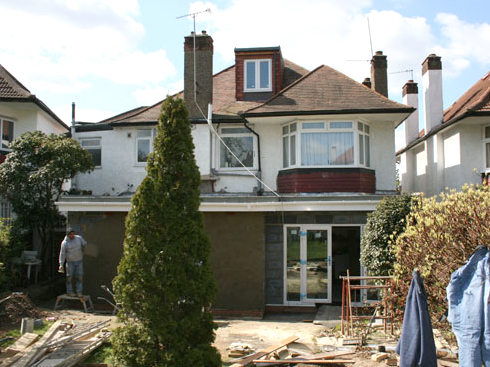
Meet Mr & Mrs Burgess
Say a BIG "Hello" to Mr & Mrs Burgess. They’re a little short of space after the arrival of their little baby boy – Awww! So they need their House Extended to create a new larger Kitchen and give them more family space.
So what is the BIG Plan?
The idea is to Extend the Buildings Rear ground floor to create an additional new Kitchen and Lounge building the entire house out by another 17 feet into the garden. The work costs around £25,000 but will add over £100,000 to their House when they come to sell. Making them a very tidy £75,000!
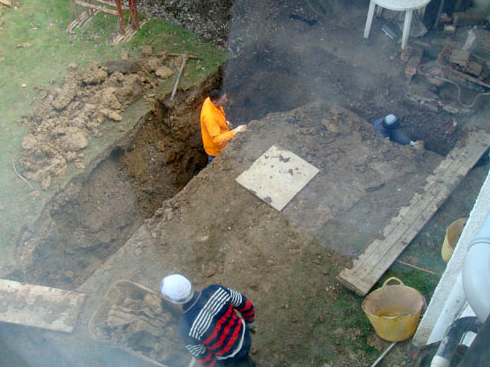
The First Steps
So first things first we need to dig the footings. These need comply with the depth & specified by the Local Councils Building & Planning regulations which in this instance is 9ft deep.
Useful Tip: Walben Homes are hugely experienced in dealing with Planning & Building Regulations so we experts in helping you with any questions you might have.

Always start with the Base
After digging the Footings the Concrete is mixed and poured into the 9ft trench to create a sturdy base on which the Extension walls will be built. There’s no worries with our wall and subsidence!
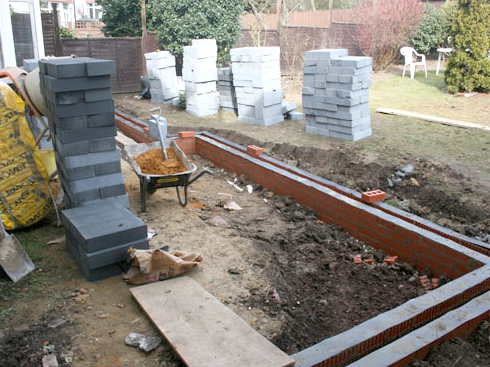
Concrete Lintel & Damp proofing
Next we lay down the Lintel and put on the Damp Proof Course. We don’t want any damp issues later on so we put the Course at least 150mm above ground level in order to stop moisture getting in – this is known in the trade as “rising damp”.
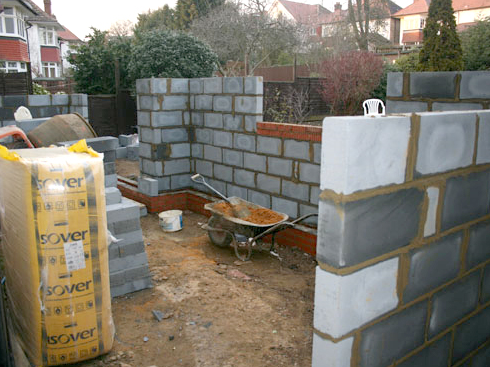
Build the extension Wall
Next we have to put the walls up. We use Solar Blocks to build up the new Extensions walls. These will be insulated later once another internal layer is built inside, so the Burgess’s new extension will be nice and warm in the winter.
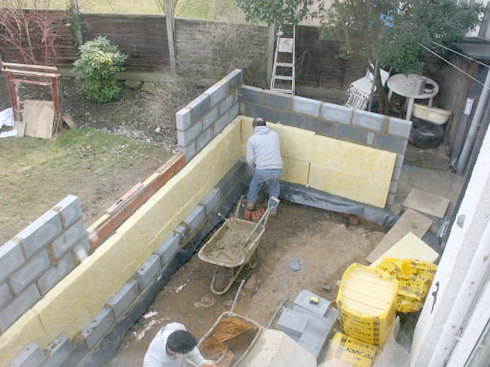
Cavity Wall Insulation
In goes the insulation. We insulate the walls to an energy value of .3 u because we care about Energy conservation. We want to save you money year on year by reducing your heating bills and CO2 emissions making your home greener and more energy efficient.
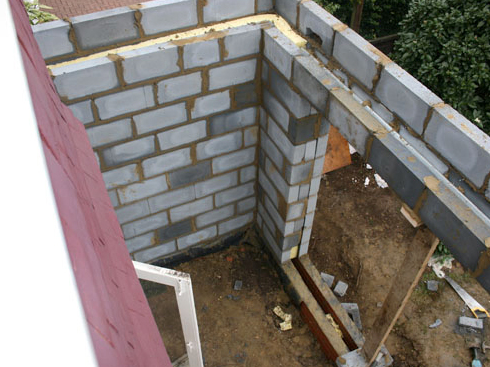
Interior Walls
Now with the Insulation put in its time to build up the Interior Walls with Solar Blocks. With the Insulation in place encased in the cavity we can begin to build the interior walls, building up to the height of the plate level.

Walls completed
With the wall put up our Building Extension is really starting to take shape. It’s now time for the steel beams that support the roof to be fitted then it’s onto the real Roofing construction. Exciting!
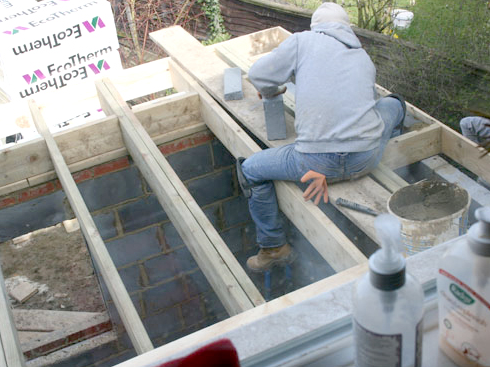
Timber Roof Frame
With the newly installed Steel Beams in place the main weight of the Extension Roof can comfortably be supported, so it’s time to begin building it! And, the solid wooden framework sits on top of our Exterior walls to help distribute the roof weight evenly.
Timber Roof Frame (continued)
With the Roofs wooden frame installed we can lay down the Roofing top and Insulation.

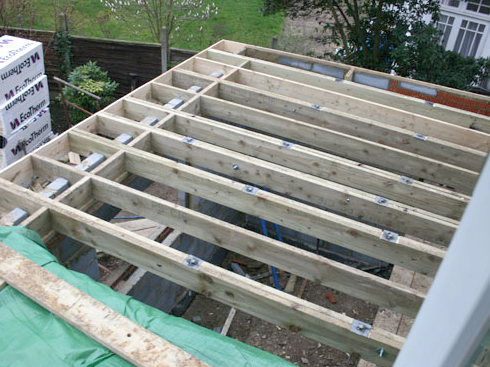
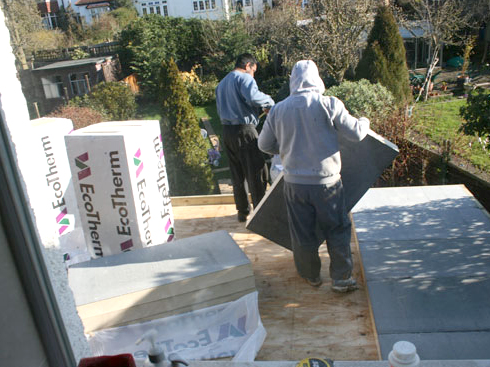
Roof Timber Panelling
Next up is the Timber Panelling for the roof. After laying down the Timber Roof Panels and an insulating layer to keep out the cold a final asphalt membrane is layered on top to keep the whole thing watertight.
Roof Insulation
So here is the Thermal Insulation being put in. We lays this to a depth of 10cm Centimetres to keep in all the heat. Saving you money in heating bills and looking after the environment at the same time.
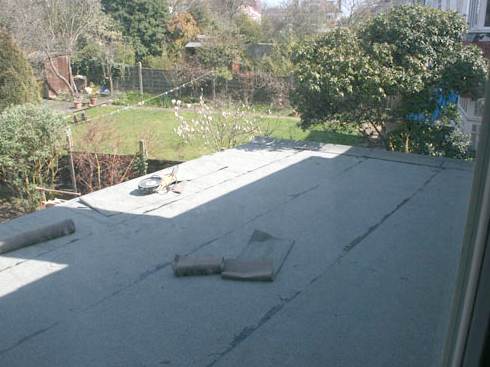
Roof Completed
After insulating the roof we need to asphalt and tar it to ensure it’s well insulated and waterproof. Then it’s time to head inside now and begin all the electrical wiring, water and plumbing.
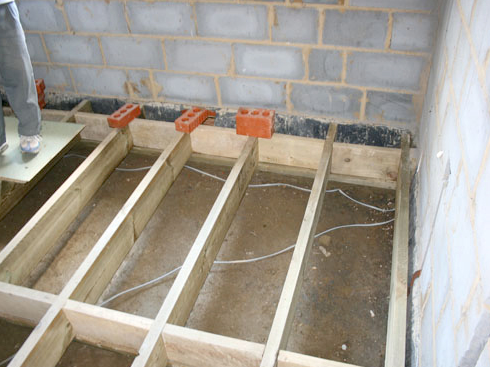
Wooden Floor Frame
Now the wooden frame for the floor to sit on goes in. All our wiring and plumbing will run underneath and hidden away.
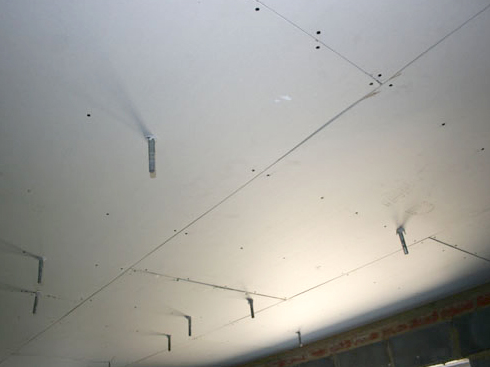
Roofing Plasterboard
The underside of the Roof is plaster boarded and all relevant fittings attached so that the plaster can be plastered.

Plastering & Finishing Exterior
Meanwhile… while the work inside is just getting underway the outside is being finished. The exterior Masonry is Plastered to give a smooth finish that looks great.
Plastering & Finishing Exterior (continued)
Now everything is really starting to take shape! The Windows and Doors are also installed.
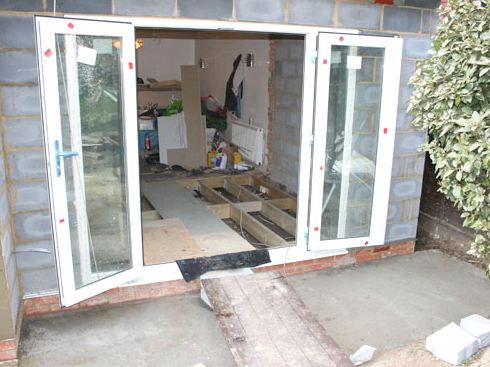
Plastering & Finishing Exterior (continued)
As the this Extension opens out straight into the Garden our couple have asked for large Bi fold doors to be installed. This gives them plenty of access to the garden.
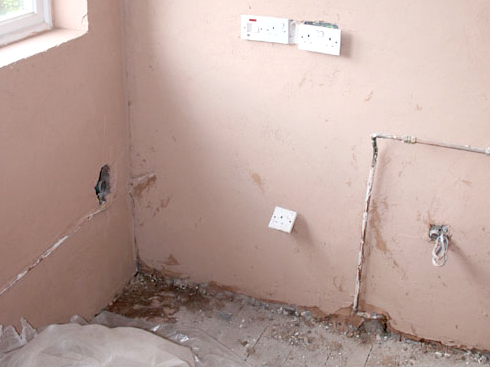
Interior Plastering and Flooring
As soon as the plaster is set and all nice and dry the finishing can begin. The room will soon be ready for paining and tiling.
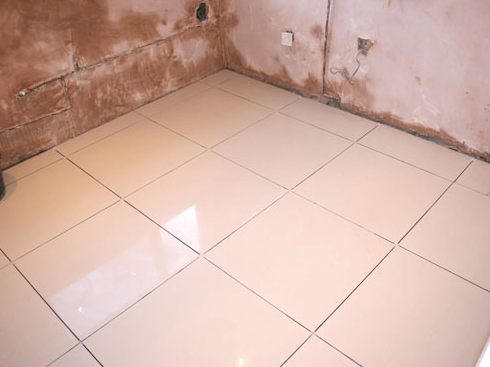
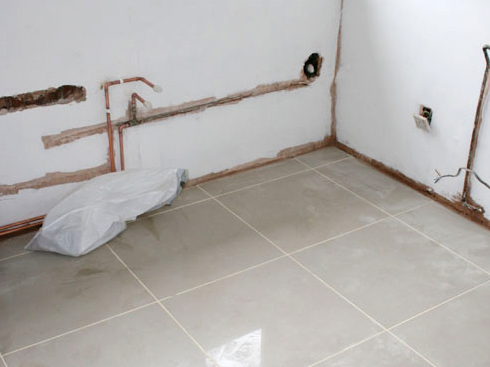
Floor Tiles
Here we see the tiles going into the Kitchen creating a lovely new floor.
Remember Welban Homes take care of everything for you! From building your Extension to tiling, plumbing, kitchen fitting, electrics and final decoration we do it all.
Painting
The plaster is Painted and we’re ready for our brand new Kitchen to be installed and fitted. Not long now till we’re done. Wow that was fast!
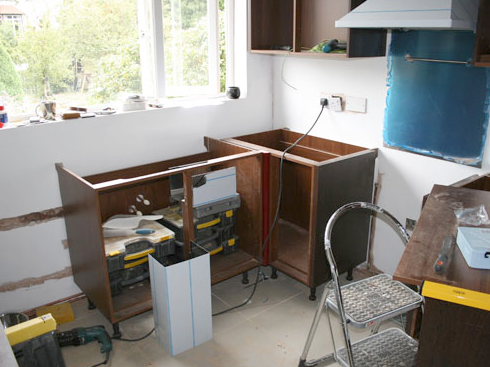
Kitchen Installed
In come the Kitchen fitters. In just 2 days the entire kitchen is fitted creating a new, modern environment that’s simply stunning.
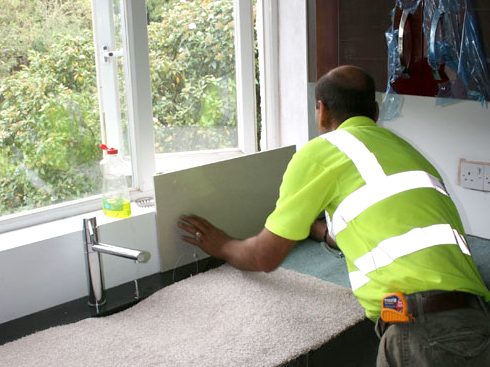
Walls Prepped and Prepared for Tiling
Next on the to do list – Tiling the walls. Now that all the Kitchen and units are in place we can start to think about all those amazing finishing touches.
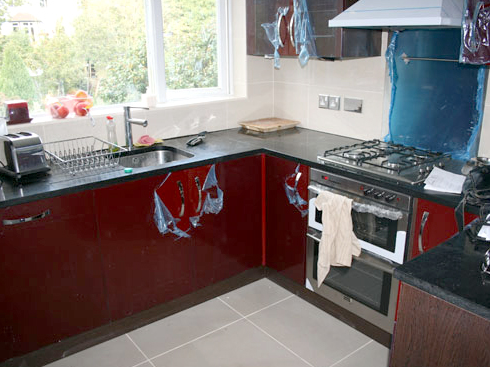
The new Kitchen
Ta-daa we’re all done! All there is to do now is rip off the protective Blue plastic and discover our beautiful shiny new kitchen.
Next up is the Lounge. Watch this space for more pics and updates.

Image

36a Barn Rise
Mr & Mrs Burgess wanted to extend the rear of their house